Stacking the
Blocks...
All of the following
issues are fully described in much greater detail in our new book
which is titled DryStacked Construction Handbook.
This website will alert you to many of the home construction considerations
for using drystacking. The book will show easy step by step methods
to work around these and other dry-stacked construction potential
problems. While these explainations may seem difficult, the book offers
simple solutions using spreadsheet tables or Freeware CAD programs
to accomodate most of these block stacking issues. Our
new videos also demonstrates the stacking procedures.
Half-block
Madness
This detail concerns the fact that half blocks (half in length) are
not really half at all. They are 7-5/8-inches long to allow room for
3/8-inch of mortar. So the installed block length of a half block
is 7-5/8 + 1/16 = 7.6875-inches, which can be rounded up to 7.7-inches.
The 1/16" allows for the fact that blocks can never be perfectly
butted against each other. There will always be some slight gap between
blocks. We have found this gap to be typically 1/16". Please
note that two stacked half- blocks equals 15.4-inches of length instead
of 15.7-inches which is the installed length of one full block. This
means that two half-blocks in a wall makes that wall's row of blocks
short by 0.3- inches. This by itself seems to be no big deal, but
just try to stack the next row with all even blocks and that next
row will be 0.3-inches longer, which will throw the ending corner
or door opening out of alignment.
If another wall
had two corner blocks (which are 8-inches wide + 1/16-inch) and full
length blocks in between, then that row would be 8.0625 x 2 minus
15.7 which equals 0.425-inches longer than the row above or below.
So there you have it, we have two different kinds of half blocks.
We have corner half blocks which are whole blocks wrapped around the
corner, which have an installed width of 8.0625 inches; and we have
linear half-blocks which run with the wall length, and have an installed
length of 7.7-inches.
Wall
Growth Madness
Wall growth is what happens when the wall starts getting longer on
its own. This happens when the previous rows of blocks become unleveled
lengthwise. This forces a larger gap between the blocks as shown in
the drawing. This slight increase accumulates along the wall and can
make the wall end up an inch or more longer as the wall stacks. So
here is another fudge factor. Experience has shown that wall growth
seems to remain less than 1/16-inch per full block, when you re-level
the blocks with mortar after stacking the sixth row. This standard
of mortaring the blocks on the seventh row fixes block unevenness
and controls wall growth that can accumulate within six rows of stacking.
Where to Measure
From
Another dimensioning consideration is to remember where you do the
measuring. Because block walls are quite thick (8" + insulation
+ sheetrock thickness), this thickness should be considered because
it will reduce room size when a block wall is involved and measurements
are from the outside of the wall. The floor plan must use outside
wall dimensions because these set the foundation dimensions which
must be large enough for block placement. Many stick floor plans measure
from the wall center and this will not work for outside block walls
and the associated foundation plan. DO NOT get caught by this middle
wall measurement concept used in stick plans. Your Foundation Plan
must be accurate!
Out
of Plane Blocks
The next concern is about blocks where the top plane and the bottom
plane are not parallel. Block lengthwise out of plane don't cause
any significant problems, but block width out of plane will make the
wall start to lean in or out as these errors accumulate in stacked
rows. This problem occurs when the outside of a block is slightly
higher than the inside of the block. We are talking about 1/128-inch
or less, which is not noticeable with the naked eye. It is noticeable
though when the wall starts to lean because of an accumulation of
these out of plane blocks.
This problem has
an easy solution for correction. Simply check the level (across the
wall) as you place each block. When the block is causing the problem,
rotation of the block will lessen the problem, or may in fact make
the top of that block perfectly level again. The leaning block diagram
demonstrates this effect. The left wall leans, but the right wall
remains plumb using the same blocks with the same plane error. Simply
rotating blocks 2 and 4 in the diagram solved the problem completely.
Stepped Blocks
If you notice that the blocks start jutting in or out relative to
the row beneath, just to keep the wall plumb, then you are experiencing
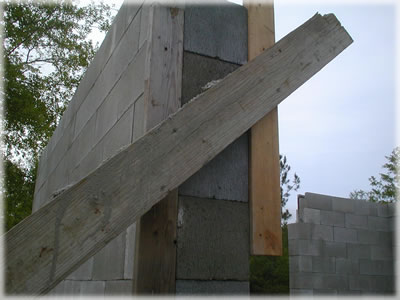
a leaning wall which must be stepped to remain plumb. This stepped
action is correcting for blocks, which are not level or are out of
plane. You should fix the leveling problem and not continue stepping
these blocks. Very slight stepping can be tolerated due to the thickness
of the SBC. Significant stepping should be corrected to keep your
home construction project professional.
Return
to Top