
Dry Stacked Block Construction Build Sequence
Successful project construction is dependent upon many differing factors. The build sequence is just one of these factors. The book devotes many chapters to the requirements of each sequence and fully explains how to accomplish each sequence. Below is a condensed sequence of home construction extracted from the book.
1. Wall Cell Rebar Locations
The location of each reinforced wall cell must be determined before the foundation can be poured. I have found it best to take the Foundation Plan, and copy it to another plan called the Cell Plan. Now you can show the location to insert each required cell during the foundation pour.
2. Mortar First Row
Once the Foundation is poured and cured for at least one week, now mortar that first row of blocks which establishes the shape of the building. Only the bottom of the blocks are mortared. No mortar between adjacent blocks! Extra care must be taken to ensure that there is ample space for the second row of blocks to rest upon that first row of blocks. This will not be a problem while using half-block wall dimensions derived from our Appendix “A” described in this video segment.
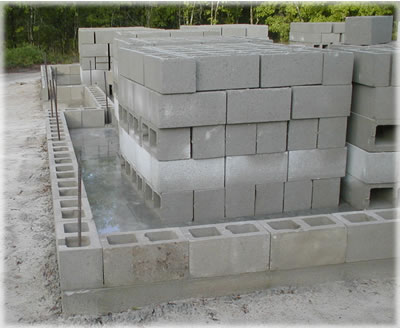
This first row block height must be completely level. This is why the first row is mortared. A level first row of blocks will result in dry stacked walls that are straight and plumb.
That first row of blocks must be straight and have properly placed corner blocks and inspection blocks. Inspection blocks have one cell side cutout so the inspector can confirm rebar detail in the cell before filling with concrete. This is an important step in the build sequence.
3. Striking the Mortar
Striking the mortar uses a special tool to rub the fresh mortar where the block joins the foundation. It is just a curved piece of metal. The striking process compacts the mortar making it more dense, which makes it stronger and more water resistant.
4. Placing Row Segments
Place each block butt against the previous concrete block during the build sequence (no mortar between the blocks). The same string that is used to keep the wall straight can also be used to set block reference height during row mortaring, providing you take certain precautions. This is fully explained in the book and demonstrated in the videos.
5. Closing that Row Segment
Once you reach half way along this wall segment, go to the opposite corner and work back to the point where you stopped by following the same string. The closing concrete block is where the two row half-segments join as one row segment. If all goes well, the closing block will be a little bit to short. Here is a fix for blocks slightly too long.
6. Dry-stacking the Walls
With the first row mortared straight and level, it is now time to start dry stacking. You must work from the corners to the center of each wall segment. This will insure wall flatness and prevent wall curving.
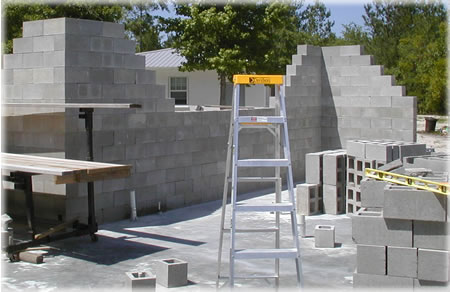
Begin by stacking the corner blocks for several rows—my personal practice is to go up six rows. During this process, it’s crucial to maintain the corners’ alignment in both directions from the corner point. This step holds substantial significance within the construction sequence, playing a pivotal role in guaranteeing the stability and safety of the wall.
To ensure accurate alignment, span a mason’s string between the corners and proceed to dry stack your concrete blocks along this stretched string, effectively closing the wall row. Afterward, advance the string upward by one row and replicate the same procedure. It might be necessary to provide bracing for the dry stacked walls to ensure safety. Keep in mind that improper bracing methods could pose risks, so I recommend consulting our suggested resources, including books and videos, for guidance on this aspect.
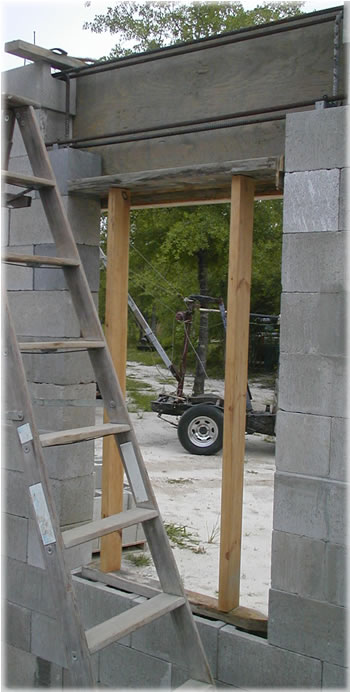
7. Pour Wall Cells
Pouring wall vertical reinforcement cells after wall cell rebar inspection. Then close off the inspection block openings, and pour the cells full of concrete. For door and window openings, you will probably leave off the top block or two as shown in the pictures below. Stop the door and window opening cell pours in the middle of the top block for that door or window opening. Later, the header pour will overlap inside of this top block resulting in a stronger wall/header interface. For other wall cells, pour up to just 4-inches inside the top lintel block. This will lock that lintel block into place with the wall cell, and still allow the bond-beam concrete to interlock within this block at a later time.

8. Form & Pour Headers & part of the Bond-beam
After pouring the vertical reinforcement cells of the wall and providing sufficient time for them to solidify overnight, the walls attain a level of stability that permits the installation of header forms. This phase involves shaping the headers for doors and windows, incorporating the requisite rebar for both the header and bond-beam components, and subsequently arranging for an inspection of these installations.
Furthermore, it’s essential to measure and designate the positions of each truss tie-down strap. Depending on the specific conditions at the construction site, there might be a necessity for supplementary wall bracing. This requirement would be contingent on the circumstances inherent to the construction environment.
Pour header concrete extended into the adjacent lintel concrete blocks at least one-half block length. This will lock those lintel blocks into place, and provide overlap when the rest of the bond-beam is poured. Be sure to insert the truss tie-down straps at the marked locations while pouring the headers.
9. Pour the Bond-beam in this build sequence
A few days later, you remove the header forms, and pour the rest of the bond-beam. The rebar locks together the separate pours. You must also insert the remaining roof truss tie-down straps at their marked locations as you pour the remaining bond beam.
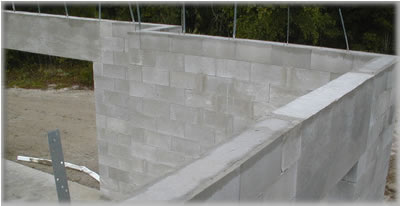
Notice in this picture there are no roof truss tie-down straps. This is an inside wall between the house and the attached garage.
10. Surface Bond the Walls
Surface-Bonding Cement (SBC) serves as the adhesive to unite all the dry-stacked blocks into a seamless and cohesive structural entity. This cement is remarkably robust due to its fiber reinforcement, resulting in a strong, thin layer of bonding.
Upon determining the desired ratio, add the specified quantity of water to the mixer prior to introducing the SBC from the bag. This method ensures consistent outcomes, preserving a smooth and lump-free mixture. Comprehensive guidance is available in the book, along with instructional videos for further insight.
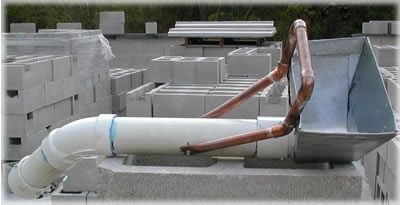
For the spraying process, a dedicated sprayer is required. You can refer to an image of my own sprayer, and the book outlines the construction process for this straightforward sprayer design. Alternatively, you have the option to purchase a sprayer online. After the wall has been sprayed, the subsequent step involves troweling the sprayed section until it achieves a flat surface. To this end, I personally employ a rectangular trowel equipped with a sturdy handle. The ergonomic design of the handle lessens strain while offering precise control over the troweling process. This technique is also visually demonstrated in one of our videos.
Maintain the advancing edge of the trowel at a slightly elevated position compared to the trailing edge consistently. Failing to lift the advancing edge could result in an unintended gouge, necessitating subsequent correction. With practice, you’ll acquire the proficiency to transition the trowel’s direction without causing gouges. Given that these skills are honed through hands-on experience, I recommend commencing your practice in an area that will eventually be concealed, such as an interior wall destined for sheet rock covering. Detailed guidance on this technique is available in a video demonstration we provide.